


Hey There Knit Pattern
- Feb 9, 2022
- 3 min read
The funniest thing happened to me last week while I was working. There I was finishing up a long and rigorous day, and when I glanced up at my stash, there were these two skeins of yarn that started flirting with me.

No joke. These two skeins of The Wandering Flock Bulky in Peach Melba were winking and smiling at me and tempting me to put down my WIP and play with them instead.

So I took the plunge and had a little fun over the weekend. Instead of keeping the design journey with these two skeins from my stash all to myself, I shared it through my Instagram stories.
And the result...
A beautiful, squishy soft cowl pattern that I'm happy to share with all of you for free!
Hey There is free here within this post and in the reels on my Instagram. This is a beginner-level project, so I am including a little more detailed information. If you'd like a more "noise-free" downloadable version, one is available on Ravelry, Etsy, and Knitcrate for a small fee.
Hey There
by Aimée Hansen / Yarngerie

Materials You'll Need ~
The Yarn:
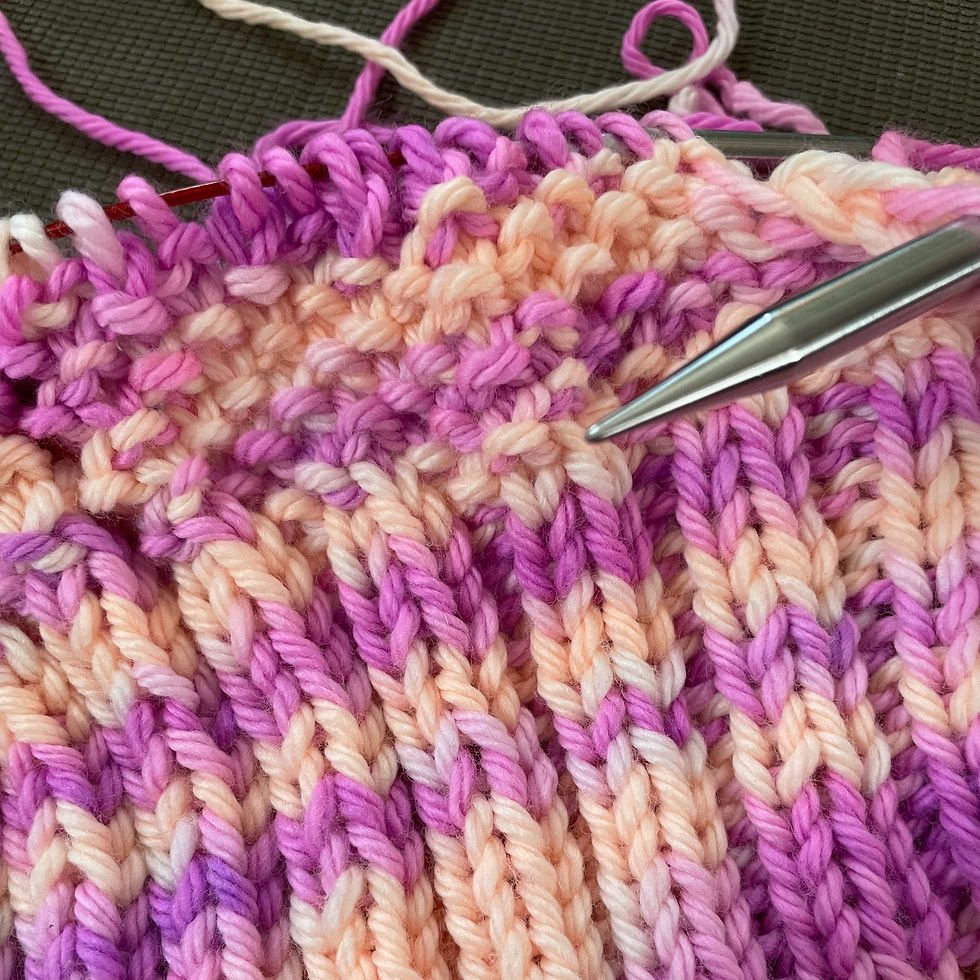
You will need approximately 212 yds (193m) of bulky weight yarn. For this pattern, I used 2 skeins of The Wandering Flock Bulky that I had in my stash. Geraldine has beautiful colorways that pool and swirl so nicely when knit up. This yarn would look fabulous as well in a speckled, tonal, or solid yarn, but variegated yarns should give you some very fun pooling with this pattern.
The Needle:
You will need a US 11 (8mm) circular needle with a 16" (40mm) cable. I tested out one size up and down from this, but I felt that the 11's looked the best.

The Notions:
For this pattern, you will need one stitch marker to mark the beginning of your rounds, along with a tapestry needle for weaving in the ends.

Let's talk about some specific aspects for this pattern.
The Gauge:
The 4" (10cm) gauge for this pattern is approximately 12 stitches by 20 rounds in a 2x2 rib (which means you knit 2 stitches, then purl 2 stitches, then repeat). I lightly steam blocked the cowl before measuring gauge.

The Finished Measurements:
This finished cowl measured out to a 34" (86cm) circumference and 11.5" (29cm) high.
Size Adjustments: This pattern is very easily adjustable. If you'd like to make a longer cowl, increase the beginning cast on by a multiple of 4 stitches. For a shorter, tighter-fitting cowl, decrease the beginning cast on by a multiple of 4 stitches. If you'd like to increase the height of the cowl, do additional repeats of rounds 17 and 18. Any increases to the instructions as written will require more yarn.
The Pattern:
With long tail cast on method, cast on 100 stitches.

Join in the round being careful not to twist. Place a stitch marker to mark the beginning of the round.

Note: You will slip the stitch marker from the left needle to your right needle at the end of every round.
Round 1: (Knit 2, purl 2) around.

Rounds 2-16: Repeat Round 1.

Round 17: (Knit 1, purl 1) around.
Round 18: (Purl 1, knit 1) around.

Rounds 19-40: Repeat Rounds 17 and 18.
This yarn is SO plush and lovely!!

Rounds 41-56: Repeat Round 1.

Bind off in pattern (meaning, bind off the knit stitches knitwise, and the purl stitches purlwise). If you prefer, you can use your preferred stretchy bind off, but binding off in pattern seemed to work well for me.

Weave in all the ends.

Lightly steam the cowl, then lay it flat to fully dry. This will help even out the stitches.

Now it's ready to wear! Enjoy!

Comments